Doing the mechanical works on your bike yourself is a timepass option, a great workout, and an example of real passion.
However, it gets more interesting when it becomes the works that need both patience and concentration. Building a wheel for yourself is one of those activities.
Besides, it helps with saving money on effortless work on your bike. Knowing how to build a bike wheel is always better that will allow you to create, repair, or modify your wheels according to your taste. Even if you don’t need to build a wheel by yourself, this is a craft that can help you in any emergency.
Knowing to build anything in or on your bike is more of a survival lesson than a craft. However, it will help you to help yourself of other people around you somewhere in this life. After all, there is satisfaction for the good results of our doings.
If you have all the materials and wonder how to put them together into a working wheel, read the following sections. That will take you through all the materials and tools you need for building a perfectly working bike wheel.
After collecting the tools and materials, all you have to do is building them together as described in the information provided.
Table of Contents
Materials and Tools you Need to Build a Wheel
There are some essential parts of wheels you need on your side to start building a wheel. For tools, you can get them for a small amount of money to help in future builds. Or you can get it from someone for trying a build yourself.
Materials and Tools
The essential parts of a wheel include:
- Rim with 36 holes (Number of holes can differ with the kind of wheel you are building)
- Hub with the same number of holes (It is the center part of the wheel that holds everything together with the axle)
- Spokes and spoke Nipples (These are the individual metal wires with a thread and bend on both ends, respectively)
There is only one main tool that you need to build a wheel yourself: a Spoke Wrench.
How to Put Spokes on a Bike Rim
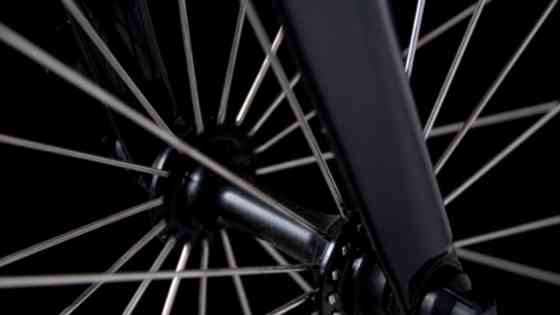
The first thing you have to do is put the spoke through the hole on the two flanges of the wheel hub. A wheel hub will have two flanges, and each of them will contain an equal number of holes in it.
There will be 18 holes on each flange for this 36 spoke-wheel we are building in this case. For the first step, you can start putting spokes into every other hole from outside. After this first step, there will be spokes directed inwards in 9 holes of the hub.
You can now start connecting each spoke with the spoke nipples from the other side of the rim. Before that, you need to note that the holes on a rim are not centered on connecting them with the spokes.
These are the holes in which the spoke nipple goes into when tightening the spokes. You can start at the hole that comes after the big hole available on the rim for the tube’s valve stem.
Connect the spokes that go from the port side of the hub into the holes located closer to the port side of the rim. When you are screwing the spoke nipple, remember to turn the nipple in equal turns for all the spokes.
After the first spoke, you can insert spokes into holes that come after every other three holes. Turning the same number of turns with all these spoke nipples would help you with the truing of the wheel after the build.
Correct the Positioning of the Spoke Nipples
To correct the positioning of the inserted spoke nipples, you can turn the hub slightly. Now, the hub will be on the center of the wheel, and you can start the second section of inserting spokes.
In this case, you have to insert the spoke from the inside of the hub. Then go in the direction of the nearby spoke to the rim. Now, insert the other end of the spoke at the ninth hole and install the spoke nipple.
Now with ten spokes on the wheel, turn around and install 9 spokes on the other flange of the hub. The holes for these spokes will be the next holes near the previously installed spokes from the other side.
Remember that, here, the holes are counted in the anti-clockwise direction. Repeat the previously done step of inserting spokes on every fourth spoke on the rim. The wheel sitting in front of us now has a total of 19 spokes inserted on it.
Here you can start inserting the spokes from the inside of the hub. It needs to be done as a continuation of one spoke installed from the inside earlier. In the end, there will be a total of 27 spokes that are installed on the wheel.
The only side remaining is the inside of the hub that needs the last nine spokes. This one is easy after inserting the first spoke on the rim into the nearest. After that, connect each spoke with the remaining holes.
Finishing the Wheel
Now you can start tightening each spoke by doing equal turns each. Please don’t do it to finish the work immediately. That can ruin the alignment of the wheel when all the spokes are seated tightly.
Work on each spoke patiently with equal turns alongside making sure about the seating of the spokes. If you tighten up one spoke more than the other, that can affect the roundness of the wheel.
Spin the wheel when all the spokes are tightened perfectly. If the wheel is perfect, then it will feel smooth and spin freely.
Truing the Wheel
This is the very final step of building a wheel before going into a bike. It helps to adjust the tension of each spoke on the wheel can remove any wobble while the whee is turning.
A Truing stand may not be available in your hand, so you can go to a nearby shop and do it professionally. If you have a stand, spinning the wheel will show you all the misalignments during the build.
The wheel will be smooth and perfect when the truing is completed. First, make sure everything is alright and the wheel is spinning smoothly. Now you can take the wheel off the stand and install it on the bikes alongside tires.
Conclusion
Building something for your bike yourself will improve your inner relation to the passion of riding a bike. So, getting an idea about how to build a bike wheel always comes to your advantage. Besides, if you can build a bike wheel perfectly, you can do any work on your bike.
We can say that building a wheel perfectly aligned is one of the most difficult jobs when it comes to putting up a bike together from the trash. Besides, it is the one procedure on a bike that needs more concentration than anything.
So, try to build an efficient bike wheel from scratch lying around in your garage. Or try repairing an old wheel by yourself.
Read More